- Gardening
AdviceKnow everything about pruning
Why Prune ?
Basic principles of pruning
How to choose your pruning equipment
When to prune ?
Pruning shrubs
Pruning hedges
Fruit trees pruning
Pruning shade trees
Pruning trees
Topiary art
Pruning of the Hydrangea Macrophylla
Pruning of Paniculata Hydrangea
Pruning of the Lagerstroemia
Pruning Roses
Pruning Lavender
Pruning of the Buddleia
Garden Law
Garden Machinery RentalFight against weeds
Why weed ?
How and when to weed ?
Weeding using chemicals
Mechanical weeding
Thermal weeding
Mulching to kill weeds
Weeding your lawn
Annual weeds
Perennial weeds
Nourish your plants
Understand how your plants grow
Each plant has its needs
The characteristics of your garden
Plants in function of your garden
An ecological garden
Gardening by the Moon
Succeed with vegetable gardenSucceed with your plantations
Planting periods
Soil Preparation
Planting Directly into the Soil
Planting in Pots, Containers or Planters
Planting Balled / container grown plants
Planting bare rooted plants
Planting Truffle Trees
Repotting a plant
Storing Plants prior to Planting
Moving a tree or shrub
Growing seeds in a pot
Raising seedlings
Prevention
Prevention is best
Protecting your plants in winter
Painting fruits trees
Over-wintering summer-flowering bulbs
When there is snow in the garden ?
What to do in case of harsh frost ?
The art of watering
Why water ?
Watering a hedge
Watering plants in the ground
Watering house plants or potted plants
Recovering rainwater
Diagnostic
Cure
Deficiencies
Fungus
Diseases
Parasites and insects
Plant Bugs
Garden decoration
Agroforestry
Maritime Pine Forestry
Douglas Fir Forestry
The truffle and it growing
Know everything about bonsai - Plants
Hedges
Bamboos Hedge
Border Hedge - Low Hedge
Country Hedge - Farmland Hedge
Defensive Hedge
Evergreen Hedge
Flowering Hedge - Blooming Hedge
Fruit Hedge
Gourmand Hedge
Melliferous Hedge
Screening Hedge
Windbreak Hedge
Forest Edge
Mature Hedge Plants
Kit Hedges
Weed Control Fabric for Hedges
Bamboos
Clumping Bamboos - Non spreading
Bamboos for hedges
Bamboos for containers and planters
Indoor bamboos
Dwarf bamboos - under 1 meter
Small bamboos - 1 to 3 meters
Medium sized bamboos - 3 to 9 meters
Giant bamboos - over 9 meters
Bamboos can be used to purify water
Anti-rhizome barrier
Fruit Trees
Fruit Trees
Strawberry plants
Fruit shrubs for small spaces
Exotic Fruit Trees and Citrus Trees
Climbing Fruit Trees
Dwarf Fruit Trees
Edible Wild fruits
Nuts
Vine - Grape
Mature Trees, Large Trees
Beech, Conifer, Maple, Oak
Olive Trees and Palm Trees
Shade trees
Trees of Fall Interest
Alignment trees
Flowering trees
Flowering Schrub
Shrubs of Fall Interest
Winter Flowering Schrub
Spring Flowering Schrub
Summer Flowering Schrub
Poolside plants
Seaside Gardens plants
Mountain Gardens plants
Shady Gardens plants
Mediterranean gardens plants
Littoral plantsRoses
In stock Roses
Low price Roses
Featured Roses
Climbing Roses
Bushes Roses
Ground cover Roses
Landscape Roses
Large flowers Roses
English Roses
Old Roses, Antique Roses
Fragrant Roses
Roses and Famous people
Orange Roses, Pink Roses, Purple Roses, Red Roses, White Roses, Yellow Roses, Variegated Roses
Climbing Plants
Plants for Acid Soil
Ground Cover Plants
Alternative plants to lawn
Organic plants for your garden
Honey Producing Plants
Aromatic Plants
Condiment Plants
Roots and Edible tubers
Forest Tree Seedlings
Plants for agroforestry
INRA certified Truffle Trees
Current plants promotions
Plants for winter planters
Plants for spring planters
Bonsai Trees
Young plants for Bonsai
Japanese garden plants
Indoor Plants
Plants for interior Green Walls
Hanging plants
Plants for Balconies
Ornamental Grasses
Perennial plants
Shade perennials
Plants for dry ground
Rare Plants
Sculptural Plants
Suculents plants
Aquatic plants
Bulbs to plant in autumn
Bulbs to plant in spring
- Gardening Tools
& MachineryGreenhouses
Greenhouses for balconies
Tunnel and growing Greenhouses
Wall Greenhouses
Garden maintenance
Sprayers
Garden Waste Bags
Leaf Blowers, Blowers Vac
Vegetable and Growing
Seed-Starting supplies
Garden vegetable seeds
Herb Seeds
Soil and Compost
Weed Control Fabrics
Tree stakes and ties
Cultivators and Tillers
Harvest and fruit picking
Fruit and Vegetables Crop Protection
Vegetable plots, Kitchen Gardens
Lawn Mowers
Strimmers and brush cutters
Grass shears
Pruning
Secateurs
Hedge Clippers, Shrub shears
Hedge Trimmers
Cutting Trees & Pruning Trees
Pruning Loppers
Pruning saws, Bow saws
Chainsaws
Axes, Log Splitters
Clothing & Protection for Gardener
Gardening Gloves
Gardening Shoes
PPE - Protective Equipments
Special Offers
Watering for Garden
Hose pipes, Micro-porous hose pipes
Watering Lances and Guns
Garden Sprinklers
Hose Connectors
Hose Hangers, Hose Reels
Watering Timers
Rainwater Collectors
Watering for House
Garden Tools
Spade, Shove, Rakes, Fork
Broom, Squeegee, Weeder
Planter, Spreader, Soil Auger
Planting tools
Garden Machinery RentalNatural Mulch
Plastic Mulch
Landscape Fabrics & Mulches
Tree stakes and ties
Forestry - Silviculture
Tree Guards, Tree Shelters
Tree stakes
Forestry Markers
Planting cane
Kids' corner
Birds and Gardens Auxiliaries
Insects Hotels
Nest Boxes
Bird Feeders
Birds Food
Shelters for Beneficial Insects
Plant Frost Protection
- Bulbs Seeds
Soil CompostGreenhouses and Tunnel
Tunnel and growing Greenhouses
Wall Greenhouses
Vegetable and Growing
Vegetable plots, Kitchen Gardens
Cultivators and Tillers
Seed-Starting supplies
Tree stakes and ties
Weed Control Fabrics
Mixtures of flowers
Attract and feed birds
Attract Butterflies
Attract Ladybirds
Banks and around trees
Fertilize your soil
Flower Magic, pink and white
Limit aphids in the vegetable patch
Limit aphids on roses
Reduce the growth of weeds
Products used in organic farming
Garden vegetable seeds - Sowing Calendar
Aubergine, Beans, Beetroot, Broad Beans, Cabbage, Carrot, Cauliflower, Celeriac, Chicory, Courgette, Cucumber, Endive, Gherkin, Lamb's Lettuce, Leek, Lettuce, Melon, Onion, Parsnip, Peas, Pepper, Potatoes, Pumpkin, Radish, Spinach, Squash, Sweet Corn, Sweet Pepper, Tomato, Turnip, Watermelon
Herb Seeds - Sowing Calendar - Herb Pots
Bulbs to plant in spring
Amaryllis bulbs, Arum lily bulbs, Begonia bulbs, Canna bulbs, Dahlia bulbs, Freesia bulbs, Gladiola bulbs, Lily bulbs, Lily of the valley bulbs
Bulbs to plant in autumn
Lawn Seed
Soil and Compost
Vegetable Garden Compost
Organic Multi-purpose Compost
Potting Compost
Geranium Compost
Ericaceous Compost
Bonsaï Compost
Expanded Clay Pebbles
Fertiliser
Dried Blood
Herbicides
Sprayers
Pest control
Captures moles, Moles repellent, Tongs for moles, Pigeons, Anti-Mosquito, Processionary Caterpillars
Birds and Gardens Auxiliaries
Insects Hotels, Nest Boxes
Bird Feeders, Birds Food, Shelters for Beneficial Insects - Pots and
PlantersPure Range - Elho
Pure Cone
Pure Cone High
Pure Round
Pure Soft Brick
Pure Soft Brick Divider
Pure Soft Brick Long
Pure Soft Round
Pure Soft Round High
Pure Straight Crystal
Pure Straight Round
Pure Straight Round High
Allure Range - Elho
Allure Doppio
Allure Ellips
Allure Ribbon
Loft Range - Elho
Loft Urban Round
Loft Urban Round High
Loft Urban Square
Loft Urban Bowl
Loft Urban Terrace
Lechuza Pots
Wicker Resin Pots
Flower boxes & Planters for Railings
Indoor plant pots
Table Planters
Color Range
Geotextile Pots and Planters
Coloured Geotextile Pots
Geotextile Raised Vegetable Bed
Hanging Geotextile Pots
Round Geotextile Pots
Foam Pots and Planters
Bowls Foam Pots
Rectangular Foam Pots
Round Foam Pots
- Garden
FurnitureGreenhouses
Greenhouses for balconies
Tunnel and growing Greenhouses
Wall Greenhouses
Vegetable plots, Kitchen Gardens
Chicken coop with vegetable garden
Gardening Tables
Raised Vegetable Plots
Small Wooden Greenhouses
Vegetable Plots
Climbing plant Supports
Garden Arches, Invisible Garden Trellis, Obelisk Garden Trellis, Planters with trellis, Plastic Trellis, Wooden pergola
Birds and Gardens Auxiliaries
Insects Hotels
Nest Boxes
Bird Feeders
Birds Food
Shelters for Beneficial InsectsBalcony screening
Balcony posters
Design privacy screens for balcony
Privacy canvases for balconies
Fixating Ties
Garden Screening
Artificial hedge
Fencing in natural heather
Fencing in natural wicker
Screen in woven matting
Wooden Garden Structures
Composting Bin
Garden Bench
Garden Bridge
porch-swing and Chairs
Log Stores - Log Sheds
Pergolas
Posts for a Clothes Line
Tables
Terraces
Outdoor Grills
Charcoal BBC, Gas BBC, Planchas, Planchas on Trolley
Hammocks
Cacoon, Classic, Hanging Chairs, Special offer, with Spreader Bars, Stands and Accessories
Exterior Tables
Inflatable Furniture
Furniture around a swimming pool
Sun Canopy - Waterproof
Sun Canopy - Openwork
Garden Chests, garden sheds
Artificial Plants
Flowering Plants, Non-Flowering House and Exotic Plants, Trailing and Hanging Plants, Ornamental Grass and Perennial Plants, Outdoor
Garden Trends 2025
Special Offers
Ponds
Preformed Ponds, Liner, Pumps, Filters, Accessories
Outdoor heater
Outdoor lighting
Luminous Objects
Garden Lanterns
Artificial Lawn
Decorative Pebbles
Decorative Mulch
Green Wall
Outdoor Canvas Wall Art
Products for Japanese Garden
Garden Sculptures and Statues
Garden Fountains
- Gift
ideas - Forest
Woodlot
Planting Balled or container grown plants
• Planting periods
• Storing Plants prior to Planting
• Planfor's perforated 1-litre Pots
• Soil Preparation
• Working the soil in winter
• Growing seeds in a pot
• Raising seedlings
• Planting Directly into the Soil
• Planting in Pots, Containers or Planters
• The good drainage for potted plants
• Planting Balled or container grown plants
• Planting bare rooted plants
• Planting Truffle Trees
• Planting Agapanthus
• Planting spring-flowering bulbs in pot
• Planting Fern in pot
• Planting a hedge of ornamental grasses
• Planting hardy plants in the autumn
• Succeeding in planting conifers
• Repotting a plant
• Propagate and increase plants by layering
• Moving a tree or shrub
• Plant a Magnolia
• Planting a tree which is going to grow quite tall
• Planting a hedge of bamboos
• Planting a fruit tree
• Potted plants which last a long time
Estimated planting time: 20 m
Difficulty:


Necessary equipment:
Compost: Quality compost is made up of peat, elements for drainage like resinous bark and nutritive elements like manure
Material for soil preparation: Spade, shovel, rotavator, plough...
Other tools: Bucket, watering can, knife or secateurs.
Helpful items: Slow release fertiliser tablets, gloves.
Stage 1
- Soak the root ball of your plant in a bucket of water. For large containers do not water at this stage.
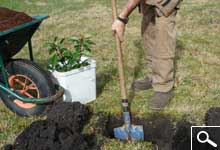
- Make a hole that is between 3 and 4 times the width and depth of the plant's root ball. This will make it easier for the plant to establish roots.
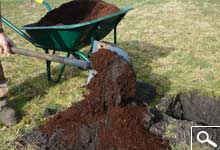
- Mix the soil with some compost to both aerate it and enrich it.
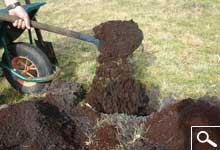
- Part fill the hole with this mix so that you are ready to put your plant in position.
Stage 2
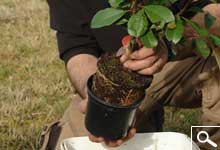
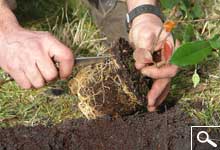
- Remove any packaging from around your plant. If there are a lot of roots protruding from the outside of the root ball, trim them off with the knife or secateurs.
- This is done to avoid the deformation of the root system and stimulate the development of new small roots, which are important for the future growth of your tree or shrub.
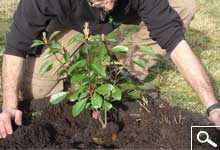
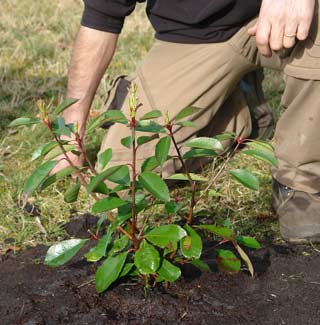
- Put your plant into the hole making sure that the above ground part is straight.
Stage 3
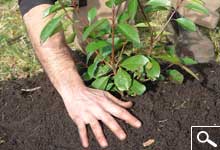
- Cover the entire root ball with the soil/compost mix to avoid the surface of it drying out.
- Use all of the soil/compost mix; you should end up with a slight mound around the base of the plant.
- It is important not to firm down the soil; this will help encourage the development of your plant's roots.
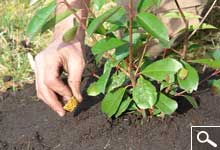
- To help further, put a slow release fertiliser tablet at the base of your plant.
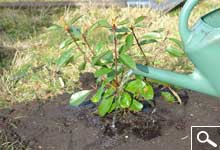
- Water generously.


