The art of Topiary
• Why Prune ?
• Basic principles of pruning
• How to choose your pruning equipment
• When to prune ?
• Pruning shrubs
• Pruning hedges
• Fruit trees pruning
• Pruning shade trees
• Pruning trees
• Topiary art
• Pruning flowering plants
• Shape a pollarded tree
• Pruning of the Hydrangea Macrophylla
• Pruning of panicle producing Hydrangeas
• Pruning of the Lagerstroemia
• Pruning Roses
• Pruning Lavender
• Pruning of the Buddleia - Butterfly shrub
• Winter pruning of the climbers producing fruits
• Pruning of the Blackcurrant and Currant bushes
• Pruning of the Wisteria
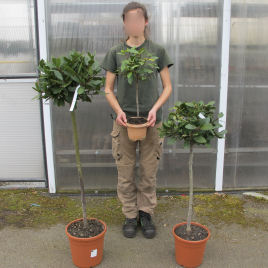
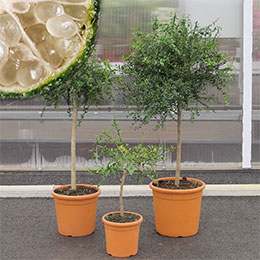
Ball Box, Cone Box, Pyramid Box, Topiary Box, Spiral Box, Olive Tree, Specimen Olive Tree, Twisted stem Bay laurel...
Secateurs, Hedge Clippers, Hedge Trimmers, Saws, Pruning Loppers, Pruning Saws, Chainsaws...
Shrubs that are used as topiary subjects are only beautiful and neat if they are pruned on a regular basis. Take your time and if you want to achieve a specific shape, then you will need to prune often.
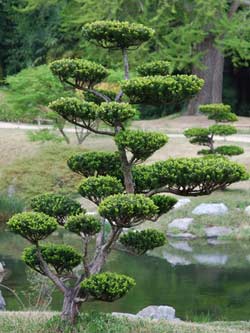
In the first year of planting and for the two or three years that follow, your aim should to be to prune in a way that encourages lots of new growth. The more new shoots that you have then the better and thicker will be the topiary. Keep the sides of the shrub roughly the same size and shape from the outset. Watch out shrubs tend to grow more at the top often to the detriment of the base. If this happens from the start then it can be very difficult to rectify later on. Therefore prune more severely and pay more attention to the upper parts than the base. Try to maintain the same shape that the nurseryman used when the plant was grown or the shape that you imagine.
The following years, prune regularly but do not rely too much on your eye, the work can often be too inaccurate if you are a beginner. Do what the professionals do and use either a template or a length of string. When pruning avoid making “holes” , take time to stand back and check that you are not over pruning the plant. Shake the part that has just been pruned so any clippings fall out and you can better judge the effect. Never prune the interior branches; as this will have a drastic effect on the exterior leaves, which give the subject its shape. The best approach is to prune every two months. The less fastidious amongst you could get away with three prunes a year: in the spring (March-April), end of May, then end of September.
Be careful of using motor driven trimmers, the speed of cutting can easily catch you out and lead to over cutting which is difficult to rectify, especially for the beginner. Take your time, be patient and use hand shears which allow each branch to be cut individually. Despite its apparent complexity the art of topiary is no more difficult than normal hedge cutting.
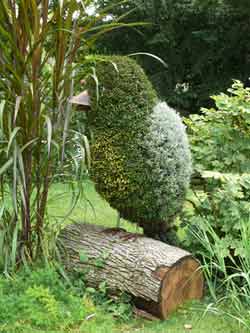
Pruning a shape
Do not hesitate to create original and free flowing shapes with a touch of fantasy! You are bound to get good results but only with a degree of patience.
Do not try to be too subtle, avoid acute angles, stylise the desired shape as far as possible, this makes it easier to fill out and also to get the right size. Out of preference chose a species with small leaves this makes it easier to get the right shape.
To better define the exact shape envisaged, build a structural model out of chicken wire and metal wire. If you are not handy or lack creativity, it is possible to find these structures already made.
In the year of planting firmly put the structure in place and then plant the shrub and cut back the branches to encourage new growth. Keep the longer branches so that they can be used to fill out the upper part of the shape. Train the other branches throughout the structure. Training the branches is as important as pruning them. I t involves guiding the stems and directing them in such a way that they take on the shape wished for.
The following year the shape will start to thicken out, limit the March pruning to just those branches that are outside of the shape or structure. Repeat this process at the end of the summer. Keep training the new branches to fill out the shape. The most important thing is that the vegetation gets denser, do not neglect to water or hesitate to apply fertiliser if needed.
At the end of 2 or 3 years you should get the plant sculpture that you imagined, the wire support will disappear amongst the vegetation.
A little tip from the professionals to save time, is to plant several shrubs, particularly useful for the bigger topiary subjects.
How to prune a cone shape or pyramid
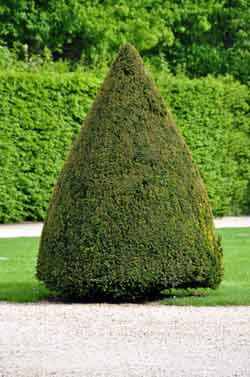
One of the classics found in topiary but not that easy to keep in shape. The forming of this shape is relatively quick, between 4 and 5 years depending on the diameter and height achieved. You can gain some time by planting a pyramid that has already been shaped by a nurseryman. The pruning will consequently be easier. Do not forget that this shape can quickly get out of balance. The vegetation will tend to grow quickly in the top parts (which need to be the slimmest part) at the expense of the bottom (which should be the widest part).
Formative pruning
As soon as it is planted cut a few centimetres off the ends of the branches, be harsher on the upper parts (cutting off 10 cm) compared to the lower areas that need to be bulkier. Form a rough cone shape. Repeat this operation throughout the year (March to September) so that the vegetation gets denser and fills in any holes as well as bulks out the overall shape by producing new branches.
The following year the ends of the branches will have spread out. Continue to prune the extremities of the branches (in March) into the shape of a pyramid, even if it is not that well defined. The most important thing is that the vegetation gets denser, do not neglect to water or feed with fertiliser if it is necessary. As the bottom parts tend to grow slower, let them grow, as they want. However, keep pruning the top harshly. Carry out this pruning regularly (every two months until September/October).
In March of the third year, prune all the young shoots that break up the outline of the shape. Prune in a manner that establishes the definitive shape, whilst still keeping the required height and diameter of the cone. Remember to go light on the bottom part, which grows less quickly than the upper parts. Repeat this operation on a regular basis.
Maintenance pruning
In the following years keep the shape neat through regular pruning (at least three times a year, in March, June and September) To make your work easier and to help with an even pruning benefit from a few tips from the professionals. Use a string attached to the middle of a ladder straddling the plant. Trace out a circle whose diameter equals that of the base of the cone. Then attach the string by means of a weight to the circle forming a straight line. This line will help you achieve the right angle and an even pruning of the shrub. Shake the shrub regularly to free any cut leaves or entangled branches.
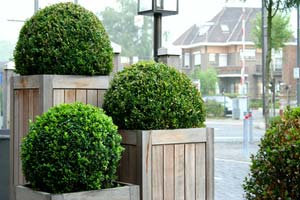
How to prune a ball
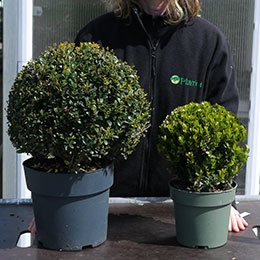
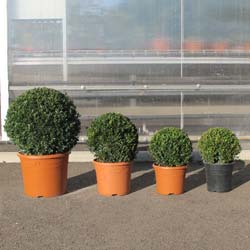
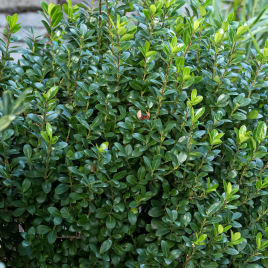
This type of pruning is a lot easier than it appears, especially if the plant is well suited to topiary such as the “box, yew or miniature honeysuckle”. The forming of the shape is rapid, 4 to 5 years or more depending on the desired diameter. It is possible to win some time by planting a pre shaped specimen already grown by a nurseryman. In this case, the pruning will also be easier.
Formative pruning
As soon as it is planted cut a few centimetres off the ends of the branches (from 5 to 10cm maximum) so that the base remains bushy giving it a rough ball shape.
The following year the branches will branch out. Continue pruning (in March) the ends of the branches to define a ball even if it is roughly shaped. The most important thing is that the vegetation gets denser so filling in any gaps and bulking out the ball shape. Do not neglect to water or feed with fertilizer if necessary.
The following year in March cut all the young stems that are breaking up the outline of the ball. Try to prune so that the finished shape is achieved whilst maintaining the diameter of the ball. Make sure that you create a ball and not only half a ball or a blob. Do not hesitate to trim the lower part to maintain the spherical shape. However, do not be too heavy handed. Remember that the lower part grows slower than the upper parts. Repeat this pruning at the end of the summer.
Maintenance pruning
In the following years try and keep a nice neat shape and prune regularly (at least twice a year between March and September) Begin at the top and then trim down on two opposite sides so giving you a reference point. Then prune the remaining quarters in all directions. Shake the ball regularly (mainly for box) so that the cut leaves fall out. To make the work easier and get a more even trim here is a tip from the professionals, prune with the help of a template made out of cardboard or plywood.


